Diablo 2 Installation Guide

Today we are going to be installing Diablo 2 in 2021! This process should be really quick and easy but Blizzard has definitely made it complicated. With this guide though, you will be playing Diablo 2 on Windows 10 in no time at all!

Installation Guide

Time needed: 30 minutes

Lets walk through the steps to install Diablo 2 Lord of Destruction.

  1. Purchase the game if you don’t own it already.

    If you don’t already own the game head over to https://shop.battle.net and purchase the game. You need to click Games and then Diablo II: Resurrected. On the Resurrected page you can find the Diablo 2 & Diablo 2: Lord of Destruction for around $10 each.

  2. Download the Installers

    Head over to https://account.battle.net and click Games & Subscriptions. Scroll to the bottom of the page to find Classic Games. Here you will see your CD Keys as well as links to download both of the installers. Download both installers and continue to the next step.

  3. Install Diablo 2

    Next we need to click on the Diablo 2 installer that we downloaded. Once it opens up, you will need to put in your name and license key to continue. After that it should download and install just fine. There are some javascript errors that will pop up but those can be ignored.

  4. Install Diablo 2: Lord of Destruction

    Once you have Diablo 2 installed, it’s time to install the expansion. Close out the Diablo 2 installer after it has finished and open up the Diablo 2: Lord of Destruction installer. A popup will appear asking for your Diablo 2: Lord of Destruction CD Key. Once you fill that in and continue, the install should be pretty quick.

  5. Play the game!

    Once the Diablo 2: Lord of Destruction installer finishes, you should be able to just open “Diablo II.exe”. I hope this guide was helpful and I really hope you have a good time playing Diablo 2!

FAQ

Can you install Diablo 2 through the Battle.Net Launcher?

Currently you cannot install Diablo 2 using the Battle.Net Launcher.

Where can I download Diablo 2?

You will need to use Blizzard’s https://Battle.Net website to download Diablo 2 and Diablo 2 Lord of Destruction.

How much does Diablo 2 and Diablo 2 Lord of Destruction cost?

Currently, both Diablo 2 and Diablo 2 Lord of Destruction cost around $10 each.

Can you install Diablo 2 on Windows 10

Yes! Diablo 2 can easily be installed on windows 10

Do you need Diablo 2 to play Diablo 2 Lord of Destruction

Yes, you need Diablo 2 installed to install the Lord of Destruction expansion.

Diablo 2 Horadric Cube Recipes

Upgrade Runes

The Horadric Cube can be used to upgrade runes! If you have, 3 Tir runes, you can place them into your Horadric Cube and click transmute. After your transmutation is complete, you will have 1 Nef rune in your Horadric Cube.

This can be very useful when you are only missing a specific rune.

Low Tier Runes

Low runes are very common drops and are used in many Runeword recipes.

  • Eld = 3 EL
  • Tir = 3 Eld
  • Nef = 3 Tir
  • Eth = 3 Nef
  • Tal = 3 Ith
  • Ral = 3 Tal
  • Ort = 3 Ral
  • Thul = 3 Ort
  • Amn = 3 Thul + Chipped Topaz
  • Sol = 3 Amn + Chipped Amethyst
  • Shael = 3 Sol + Chipped Sapphire
  • Dol = 3 Shael + Chipped Ruby

Mid Tier Runes

These runes drop less frequently than low runes but are used in many powerful Runewords.

  • Hel = 3 Dol + Chipped Emerald
  • Lum = 3 IO + Flawed Topaz
  • Ko = 3 Lum + Flawed Amethyst
  • Fal = 3 Ko + Flawed Sapphire
  • Lem = 3 Fal + Flawed Ruby
  • Pul = 3 Lem + Flawed Emerald
  • Um = 3 Pul + Flawed Diamond

High Tier Runes

These are very rare runes that only drop in hell difficulty. These runes are used to complete the most powerful Runewords in the game!

  • Mal = 2 Um + Topaz
  • Ist = 2 Mal + Amethyst
  • Gul = 2 Ist + Sapphire
  • Vex = 2 Gul + Ruby
  • Ohm = 2 Vex + Emerald
  • Lo = 2x Ohm + Diamond
  • Sur = 2 Lo + Flawless Topaz
  • Ber = 2 Sur + Flawless Amethyst
  • Jah = 2 Ber + Flawless Sapphhire
  • Cham = 2 Jah + Flawless Ruby
  • Zod = 2 Cham + Flawless Emerald

Secret Cow Level

The Secret Cow Level, which can also be known as the Moo Moo Farm, is a hidden level in Diablo II. To access the Secret Cow Level, you will need to create a portal in town using the following Horadric Cube recipe.

Secret Cow Level = Wirt’s Leg + Tome of Town Portal

Wirt’s Leg will have to be picked up from Tristram by clicking on Wirt’s body.

Potion Recipes

The following recipes can be used for any quality potion. You can also use any type of gem, skulls are included.

  • Small Rejuvenation Potion = Health Potion x3 + Mana Potion x3 + any chipped gem
  • Full Rejuvenation Potion = Health Potion x3 + Mana Potion x3 + any normal quality gem 
  • Full Rejuvenation Potion = 3x Small Rejuvenation Potion

These potion recipes are super useful when starting out and later on to keep a good supply of full rejuvenation pots!

Reset Talent Points

  • Token of Absolution = Essence of Suffering + Essence of Hatred + Essence of Terror + Essence of Destruction

Once you create the Token of Absolution it can be used to reset your stat points.

The essences are obtained from the following bosses in Hell difficulty:

  • Andariel and Duriel – Essence of Suffering
  • Mephisto – Essence of Hatred
  • Diablo – Essence of Terror
  • Baal – Essence of Destruction

Uber Tristram (Pandemonium Event)

The following recipe has to be crafted on Hell difficulty in Harrogath, which is the town in act 5.

  • Portal to either Matron’s Den, Furnace of Pain, or Forgotten Sands = Key of Terror + Key of Hate + Key of Destruction

The portals will be random but if you open 3 portals in the same game, you will get one of each. Once you have gotten all 3 items you can open the portal to Uber Tristram

  • Uber Tristram portal = Baal’s Eye + Diablo’s Horn + Mephisto’s Brain

Diablo 2 Runes

RuneNameStatsLevel
ElWeapons: +50 To Attack Rating, +1 to Light Radius
Armor: +15 Defense, +1 to Light Radius
Helms: +15 Defense, +1 to Light Radius
Shields: +15 Defense, +1 to Light Radius
11
EldWeapons: +75% Damage To Undead, +50 Attack Rating Against Undead
Armor: 15% Slower Stamina Drain
Helms: 15% Slower Stamina Drain
Shields: 7% Increased Chance of Blocking
11
TirWeapons: +2 To Mana After Each Kill
Armor: +2 To Mana After Each Kill
Helms: +2 To Mana After Each Kill
Shields: +2 To Mana After Each Kill
13
NefWeapons: Knockback
Armor: +30 Defense Vs. Missile
Helms: +30 Defense Vs. Missile
Shields: +30 Defense Vs. Missile
13
EthWeapons: -25% To Target Defense
Armor: Regenerate Mana 15%
Helms: Regenerate Mana 15%
Shields: Regenerate Mana 15%
15
IthWeapons: +9 To Maximum Damage
Armor: 15% Damage Taken Goes to Mana
Helms: 15% Damage Taken Goes to Mana
Shields: 15% Damage Taken Goes to Mana
15
TalWeapons: +75 Poison Damage Over 5 Seconds
Armor: Poison Resist 30%
Helms: Poison Resist 30%
Shields: Poison Resist 35%
17
RalWeapons: Adds 5-30 Fire Damage
Armor: Fire Resist 30%
Helms: Fire Resist 30%
Shields: Fire Resist 35%
19
OrtWeapons: Adds 5-30 Fire Damage
Armor: Fire Resist 30%
Helms: Fire Resist 30%
Shields: Fire Resist 35%
21
ThulWeapons: Adds 3-14 Cold Damage – 3 Second Duration
Armor: Cold Resist 30%
Helms: Cold Resist 30%
Shields: Cold Resist 35%
23
AmnWeapons: 7% Life Stolen Per Hit
Armor: Attacker Takes Damage of 14
Helms: Attacker Takes Damage of 14
Shields: Attacker Takes Damage of 14
25
SolWeapons: +9 To Minimum Damage
Armor: Damage Reduced By 7
Helms: Damage Reduced By 7
Shields: Damage Reduced By 7
27
ShaelWeapons: 20% Increased Attack Speed
Armor: 20% Faster Hit Recovery
Helms: 20% Faster Hit Recovery
Shields: 20% Faster Block Rate
29
DolWeapons: Hit Causes Monster To Flee 25%
Armor: Replenish Life +7
Helms: Replenish Life +7
Shields: Replenish Life +7
31
HelWeapons: Requirements -20%
Armor: Requirements -15%
Helms: Requirements -15%
Shields: Requirements -15%
33
IoWeapons: +10 To Vitality
Armor: +10 To Vitality
Helms: +10 To Vitality
Shields: +10 To Vitality
35
LumWeapons: +10 To Energy
Armor: +10 To Energy
Helms: +10 To Energy
Shields: +10 To Energy
37
KoWeapons: +10 To Dexterity
Armor: +10 To Dexterity
Helms: +10 To Dexterity
Shields: +10 To Dexterity
39
FalWeapons: +10 To Strength
Armor: +10 To Strength
Helms: +10 To Strength
Shields: +10 To Strength
41
LemWeapons: 75% Extra Gold From Monsters
Armor: 50% Extra Gold From Monsters
Helms: 50% Extra Gold From Monsters
Shields: 50% Extra Gold From Monsters
43
PulWeapons: +75% Damage To Demons, +100 Attack Rating Against Demons
Armor: +30% Enhanced Defense
Helms: +30% Enhanced Defense
Shields: +30% Enhanced Defense
45
UmWeapons: 25% Chance of Open Wounds
Armor: All Resistances +15
Helms: All Resistances +15
Shields: All Resistances +22
47
MalWeapons: Prevent Monster Heal
Armor: Magic Damage Reduced By 7
Helms: Magic Damage Reduced By 7
Shields: Magic Damage Reduced By 7
49
IstWeapons: 30% Better Chance of Getting Magic Items
Armor: 25% Better Chance of Getting Magic Items
Helms: 25% Better Chance of Getting Magic Items
Shields: 25% Better Chance of Getting Magic Items
51
GulWeapons: 20% Bonus To Attack Rating
Armor: 5% To Maximum Poison Resist
Helms: 5% To Maximum Poison Resist
Shields: 5% To Maximum Poison Resist
53
VexWeapons: 7% Mana Stolen Per Hit
Armor: 5% To Maximum Fire Resist
Helms: 5% To Maximum Fire Resist
Shields: 5% To Maximum Fire Resist
55
OhmWeapons: +50% Enhanced Damage
Armor: 5% To Maximum Cold Resist
Helms: 5% To Maximum Cold Resist
Shields: 5% To Maximum Cold Resist
57
LoWeapons: 20% Deadly Strike
Armor: 5% To Maximum Lightning Resist
Helms: 5% To Maximum Lightning Resist
Shields: 5% To Maximum Lightning Resist
59
SurWeapons: Hit Blinds Target
Armor: Maximum Mana 5%
Helms: Maximum Mana 5%
Shields: +50 To Mana
61
BerWeapons: 20% Chance of Crushing Blow
Armor: Damage Reduced by 8%
Helms: Damage Reduced by 8%
Shields: Damage Reduced by 8%
63
JahWeapons: Ignore Target’s Defense
Armor: Increase Maximum Life 5%
Helms: Increase Maximum Life 5%
Shields: +50 Life
65
ChamWeapons: Freeze Target +3
Armor: Cannot Be Frozen
Helms: Cannot Be Frozen
Shields: Cannot Be Frozen
67
ZodWeapons: Indestructible
Armor: Indestructible
Helms: Indestructible
Shields: Indestructible
69
post

Diablo 2 Ultimate Mercenary Guide

General Mercenary Facts

  • The mod – Prevent Monster Heal does not work on mercenaries. It has no effect at all.
  • Most other mods (Crushing Blow, Open Wounds, Chance to Cast on Striking, Faster Cast Rate, Faster Hit Recovery, Increased Attack Speed, etc.) work on mercenaries.
  • Mercenaries hired in normal difficulty have better final stats than those hired in Nightmare or Hell, and NM Mercs are better than those hired in Hell. The exception being the Nightmare Act 2 mercenaries, which cannot be hired in Normal (or Hell). The actual “character” level that you hire the merc at is irrelevant, only the difficulty you hire them in.
  • The highest level a merc can be is 98. Mercs skills have been downgraded slightly in 1.10 compared to 1.09 , with the exception of the Act 1 Rogue which will no do more damage.
  • Act 5 mercenaries regenerate their health fully in 16.4 seconds, all other mercenaries require 41 seconds.
  • Poison can absolutely kill your mercenary, even while in town. You on the other hand cannot die from poison in town.
  • Mercenaries benefit from items with +all skills. However, They do not benefit from +class skills or +skill tabs. This was removed in 1.10.

    Mercs will benefit from:

    +fire skills (when applicable)
    +specific skills (if they already have the skills (e.g. an act 3 merc will benefit from an Ormus Robes’ skill if he posseses that skill already, even though it says (Sorceress)
    + skills to Bash or Stun for the Barbarian as found on some items.
  • Synergies. Some mercs skills synergize – An example of this is the Barbarians Stun and Bash skills which synergize. Act3 Mercs skills also synergize. ( i.e. Glacial spike with Ice Blast for the cold sorc)
  • When mercs levels up, their current life is set to their new base maximum life. So, if a merc is under life bonuses from Battle Orders, Oak Sage, or equipment, you will see thier life drop. Don’t be alarmed when this happens, your merc isn’t about to bite the dust.
  • You can use healing potions or rejuvenation potions on your mercenary by selecting a potion and dropping it on their portrait in the top left corner of the screen. Another way to do this is to hold Shift and press 1, 2, 3 or 4 depending on the potions location in your belt. Yet another way is holding Shift and right-clicking on a potion in your belt.
  • Similar to giving a merc a potion using the portrait: you can give your mercenary equipment via the portrait. If they can use the item, it will work. If they are already wearing this type of item, it will be exchanged for the new one.
  • Mercenaries do not have a mana pool, so mana potions do not work on them. If you try to shift + 1 method to feed your merc a mana pot, he/she will thank you, although you yourself will drink the potion. They are simply granted “infinite” mana to cast spells. So, mana burn monsters will also not affect them.
  • If your merc is wearing either Gold Find or Magic Find gear, you will receive those respective bonuses to your drops when the merc makes a kill. Example, 100% MF on char, 125% MF on merc. If you make the kill, 100% MF is in effect. If the merc makes the kill, 225% MF is in effect.
  • Ethereal items will not lose durability when equipped on a mercenary.
  • The price of resurrecting your mercenary caps out at 50,000 gold.
  • Your Mercenary’s damage is penalized against certain things:

    Attacking Penalty
    ———————–
    Players 17%
    Hirelings 25%
    Golems 100%
    Monsters 100%
    Minions 100%
    Norm Act Boss 50%
    NM Act Boss 35%
    Hell Act Boss 25%

    They receive 100% damage from everything , except other players hirelings which will only do 25% of the listed damage to your Merc.
    They receive 200% damage for Bosses – that is why they can die fairly quickly.
  • Mercs cannot leach of Hell Bosses such as Mephi and Baal, and there is a bug when facing the council in Act III, Hydra’s will do a lot more damage than they should, there is no real way to negate this except to take your mercs resistances up above 75% with Guardian Angel.
  • Mercs donot receive any life from + to vitality items, this is another minor bug, so only equip your merc with items that give actual + to life.
  • Levelling – Mercs only get experience in 2 ways – firstly if YOU make the kill they get normal experience, if they make the kill they get normal experience plus bonus experience – calculated at roughly 2x. They receive no experience if you are in a party with other players and the other players make the kill.
  • They receive the most experience in an 8 player game when you are not partied and they make the kill. As a quick reference, the following table may be of some assistance for leveling.

    1-11——-A1
    12-18——- A2
    19-23——- A3
    24-31——- A4
    32-36——- A5
    37-43——- Ni1
    44-48——- Ni2
    49-52——- Ni3
    53-62——- Ni4
    63-73——- He1
    74-80——- He2
    81-83——- He3
    83-94——- He4
    95-99——- He5
  • Mercs are all hired at different Levels , their ranges very from :

			Normal	 NM	 Hell
Rogue Scout: 3-7 37-40 67-71
Desert Warrior: 9-13 44-47 75-79
Eastern Sorceror: 15-19 49-53 79-83
Barbarian: 28-32 59-62 80-84
  • Mercs Naturally have very high resistances, so, therefore, equip them with damage reduction gear instead of resistance gear.
  • Mercs can now equip the following auras:
    Holy Freeze: found on ‘Doom‘ Runeword for polearms (Act II mercs only)
    Holy Fire: found on ‘Hand of Justice‘ Runeword for all weapons.
    Thorns: found on ‘Bramble‘ Runeword for Armours.
    Sanctuary: found on Azurewrath, unique phase blade. (act III/VI mercs only)

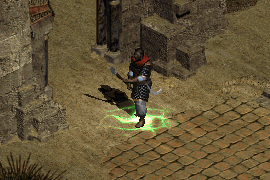
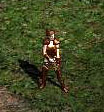
Act 1 Rogue Mercenaries

(Two Types – Cold and Fire)

Note, they are Rogues, not Amazons. As such, +Amazon skill items will not work. Also, they cannot wield (Amazon-Only) bows.

– > They can only equip bows. Crossbows are not allowed.
– > Cast either Fire Arrow or Cold Arrow
– > Cast Inner Sight

Note : The mods Fires Explosive Arrows or Bolts and Fires Magic Arrow are quirky.

– > The Explosive arrows do not work. There is a graphical bug so that you see the explosion, but no damage is dealt and the Rogue does not get the Attack Rating bonus associated with the Exploding Arrow skill.

Note : Fires Magic Arrow does deliver magic damage, but the Rogue’s still do not receive an AR bonus.

– > Act1 Mercs can now give you a Vigor aura via Harmony, Thorns via Edge, and Fanatacism via Faith.

Rogue Equipment

They tend to stay out of harm’s way reasonably well, so life leech isn’t mandotory, but a little bit certainly helps.

Increased Attack Speed can help (check speed calculator). These mercs are good at activating Chance to Cast mods without being in the thick of the battle. Blinding, fleeing, amplify damage, etc.

Hit Recovery Speeds

Frames- FHR%
11—– 0
10—– 6
9—— 13
8—— 20
7—— 32
6—— 52
5—— 86
4—— 174
3—— 600

STATS

Fire / Cold Arrow (If hired from Normal – Note that these stats will all be lower in NM and HELL if hired from there. With the exception of attack frequency which increases at 2% per difficulty.

Comparisons

Fire Arrow—Fire Damage — AR Bonus
10———-21-24————91%
15———-36 -39 ———–136%
20———-63 -70 ———–181%
25———-111-126———–226%
30———195-222————227%
35———-315-357———–316%

Cold Arrow—Cold Damage — AR Bonus
10———-22-23————–91%
15———-34 -35 ————-136%
20———-53-56 ————-181%
25———-85-90————-226%
30———151-160————–227%
35———-256-270————-316%

Cold Arrow does a fraction less damage, however at level 35 ( Level 98 Merc with +6 All skills ) You could freeze a monster in Hell for almost 10 seconds, that’s impressive

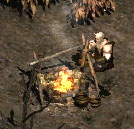
Act 2 Desert Mercenaries

( 6 Types – 3 Available in Normal and Hell, and 3 Avaialable in NM )

  • A2 Town Guards are the most popular as they share an aura with not only your Character but with the entire Party. Sometimes the aura will not activate, if this happens then simply return to town then go back out.
  • The Same Auras do not stack – For example if you are a Paladin using might and your Merc is using might these will not add up, the game will simply cycle between the two.
  • Can use Spear, Javelin, and Polearm class weapons, except not the Amazon-only spears. They won’t ever throw the Javelins.

Equipment

Get him a big damage polearm. Mods to look for are: Crushing Blow, life leech, +life, resistances, Faster Hit Recovery, Chance to Cast amp damage or decrepify, Slows Target (especially on Holy Freeze merc).

For Armor always go for Ethereal with useful mods , the Runeword Stone is very useful and popular as well. Any Armor with plus skills is also very useful as these will boost their skills.

Helms – Tal Rashas mask is good at the start with its 10% Life Leach, when you find one upgrade to an Ethereal Crown of Theives. An Ethereal Shako wouldn’t go amiss either although you will need to socket this with some form of Life leach.

Keep in mind that you cant leach off all monsters – for example the undead.

Auras Available

Normal:

  • Combat = Prayer
  • Defensive = Defiance
  • Offensive = Blessed Aim

Nightmare:

  • Combat = Thorns
  • Defensive = Holy Freeze
  • Offensive = Might

Hell:

  • Combat = Prayer
  • Defensive = Defiance
  • Offensive = Blessed Aim

Prayer – regens life , Defiance – Increases Armor Class, Blessed Aim – Increases AR , Thorns – deals damage back to attacker , Holy Freeze – Slows Monsters , Might – Increases Melee Damage.

MERC SPECIAL SKILLS

Level—–Skill—–Effect

10——-Might—–130% damage
20——-Might—–230% damage
30——-Might—–330% damage

10——-Thorns—-610% damage returned
17——-Thorns—-890% damage returned
20——-Thorns—-1010% dam. returned

10——-H/Freeze—slow 48%
17——-H/Freeze—slow 53%
20——-H/Freeze—slow 54%

11——-Prayer—-Heals 12+
18——-Prayer—-Heals 21+
21——-Prayer—-Heals 27+

11——-Defiance—170% def
18——-Defiance—240% def
21——-Defiance—270% def

11——B/Aim—-225% to AR
18——B/Aim—-330% to AR
21——B/Aim—-375% to AR

ALL A2 MERCS :

11——Jab—–AR +100% Dam+15%
16——Jab—–AR +145% Dam+30%
17——Jab—–AR +154% Dam+34%
20——Jab—–AR +181% Dam+42%

Hit Recovery Speeds


Frames– FHR%
15—– 0
14—– 5
13—– 9
12—– 14
11—– 20
10—– 30
9—– 42
8—– 60
7—– 86
6—– 142
5—– 280

This is an excellent narration from Alter Ego and I have placed it here for your reference :

Offensive – Blessed Aim

Not the most popular aura for many characters, as most of the melee characters have sufficient skills to raise their AR and the Sorceress doesn’t really need much AR as she hits with her magicical attacks. However for variant builds such as the Melee Sorc, Ranger (bow/crossbow Paladin) and Meleemancer (melee Necro) where AR is of critical importance, the blessed aim merc can be very useful. This merc can also be very helpful to Werebears who also suffer from AR problems. With the introduction of several new uniques items which grant AR (eh. Charges of enchant, zeal etc) in 1.10 though, the actual usefulness of such mercs has been somewhat diminished.

Defensive – Defiance

A high level Merc with this aura, and good equip, is very hard to hit, even in Hell diff. So a character who has hired such a merc is equally difficult to hit. The advantages of this are straightforward to any character, you’ll get hit less often, therefore be less likely to die. This aura has a pronounced effect on the longevity of a Necro’s minions, even when the Merc is of a low level. This aura is often a “must-have” for characters aiming to have a huge defence stat i.e. Ironman barbarians or for hardcore players. Just bear in mind that several of the monsters in 1.10 now have attacks that completely ignore defense.

Combat – Prayer

The life regeneration that this aura provides is probably only of use to most characters as a way to ignore the effects of poison or of life draining items (Malice runeword for example). However to characters with life steal and high resists, this aura is going to prove to be of little use, and if the merc himself has a life stealing weapon, then the aura won’t be of too much use to him. It is probably best used for characters with no form of life leech(ie. casters). Still, it is probably better to just drink a potion.

This aura is of some limited use to the Necromancer and his minions as the continual life replenish will help keep them alive for much longer. In 1.10, the minions actually heal by themselves. I

Offensive – Might

A very popular aura for almost any character, as additional damage is always useful. The Merc himself will be doing a godly amount of damage at higher levels and quite happily tank for himself and for those who think that “the best defense is a good offense” this is the way to go.

This aura is probably of least use to a Sorceress as it does not add any benefit to her magical attacks, but should she run low of mana and be caught in a corner with only a melee weapon then, this aura will give her a chance of fighting her way free.

The effect of this aura on a Necro’s minions can create a virtual wall of death to descend upon the ranks of diablo minions. A few revived Frenzytaurs or raised skeletal warriors with a might aura on them can easily sway the tide of battle in the favour of the Necromancer.

A point to note is that even if you have a might merc whose lvl is sufficient to provide 100% extra damage this won’t automatically double the damage of your character. The formula below from Nikodemous from the Paladin forum explains how your might mercs aura factors into your damage.

Lets say your weapon does 100 points of average damage. (that being the average of the minimum and maximum shown directly on the weapon). You have +100% damage from WW

200 str = +200% damage

and the might merc has lvl 7 might, which gives (40+6*10) 100% bonus.

Total damage is:

(100 * (100 [base] + 200 [str] + 100 [ww] + 100 [might]))/100 = 500 average damage

All elemental damage is added to the total, with no % bonuses on top.

Combat – Thorns

The essential problem with Thorns is that you have to be hit for it to take effect, though admittedly the effect at high levels can kill many normal monsters outright. In 1.10, with the high ratio of monster HP as compared to the damage they do, thorns is more or less reduced to a novelty aura. It is nice to have around but not entirely useful.

The Necromancer Overlord is the character build that can make best use of this aura. With many minions running around the map all effected by thorns and with the possibility of an Amp Damage curse as well, this can create havoc for boss monsters that use phycial attacks i.e Hephasto the Armourer, Duriel and the Ancients. By wading through the thorns-aura’d minions to get to the player character, these boss monsters will take an awful lot of damage.

Defensive – Holy Freeze

Another very useful for aura for any player character, more so for the slowing effect on monsters than any damage done. The only other choice besides defiance for hardcore player, this aura, at high levels, will bring many enemies to a near stop. Demon Imps stop teleporting all of the place, flayers slow right down and explody-headed Slayers are easily avoided. For characters using thrown weapons, bows or magic, the slowed monsters make ideal targets.

The Necromancer Overlord (or a Corpse Explosion Necro) is the class most disadvantaged by this aura, as the increased number of bodies that shatter upon death greatly reduces the Necro’s potential revive, summon or corpse explosion fodder.

On Hell difficulty, cold immune monsters will still be slowed by this aura.

Important Note on Holy Freeze:

It seems that not all monsters are affected by this aura. Blood Lords, Moon Lords and Death Lords of act 5 seem resistant to its slowing effects. The Frenzytaurs are immune to freezing. So do not rely on your merc to slow these monsters down. Also its good to take into account the relatively small range of holy freeze eg. archers shooting.

Act 3 Iron Wolf

( Casters, Fire, Cold , Lightning )

Lightning is damage bugged, so only choose Fire or Cold Mercs.

These Mercs can be equiped with the most MF gear, around 300%.

Do not have blocking animations. “This means they do not getting blocking check at all. The Shield will just be there for the non-blocking attributes such as defense and any other magical properties that it has such as resisitances, fast cast, skills, etc.”

They have 3 types of attacks – Their primary low level spell , their secondary high level spell, and using their sword.

They will only use their sword in melee when they get swarmed. (sometimes)

The damage listed in their character info screen is only for their sword damage, and has no impact at all on their magic damage – their character info screen does not display their actual magic damage anywhere.

+Glacial Spike, +FireBall, etc. will help these mercs. The only places to get these are from Ormus’ Robes or two pieces of the Trang’s set. Note that the +Fireball bonus from Trang’s will be capped at +3.

Anything that is +sorceress skills, for example: +2 Fire Skills (Sorceress Only) will not work, but the +3 Fire Skills of Hexfire would.

Items that lower enemy resistance (such as the Crescent Moon runeword, facets, etc.) will benefit these mercs.

Can complete the Isenhart set (for whatever that’s worth)

Equipment

Spirit = Tal + Thul + Ort + Amn ( 4 Socket Shield or Sword)

Spirit Shield ( Ladder Only)
Spirit Sword ( Ladder Only )
Ormus Robes with + 3 to Fireball or Glacial Spike
Shako

With This Setup
70%-80% Fast Cast ( 18 frames to 13 frames)
+6 All Skills
+3 To FB or GS

Your Merc would then have :

Fire
50% FC ( 18 to 14 frames )
+6 All Skills

Cold
50% FC
+4 All Skills

You want +skills and Faster Cast Rate. Everything else is secondary because they tend to survive fairly well on their own unless you let them get swarmed. The new Spirit runeword is good for their weapon. You would need +strength on your helm/armor to let them use a Spirit shield since it can only be made in a Monarch, which requires 156 strength (146 if ethereal). They top out at 153 str at level 98 and have 137 str at level 85, just to give you an idea. You’ll need some +strength stuff to equip this shield at an earlier level.

Spells

  • Fire: Inferno and FireBall
  • Cold: Glacial Spike, Ice Blast, and Frozen Armor
  • Lightning: Charged Bolt and Lightning

Act 3 Mercenary Spells in Detail

The following commentary from Zath is accurate as of 1.10.

Fire:

– Level 32 Inferno: 356 damage/second. 60% chance to cast this spell
– Level 30 Fireball: 383 damage/shot. 30% chance to cast this spell.

Cold:

– Level 28 Frozen Armor: +165% defense, lasts 444 seconds, freezes enemy upon being hit for 111 frames in normal (4.44 seconds).
– Level 14 Glacial Spike: 150 damage/shot, freezes for 89 frames in normal (3.56 seconds). 19% chance to cast this spell after Frozen Armor is active (60/310).
– Level 32 Ice Blast: 613 damage/shot, freezes for 230 frames in normal (9.2 seconds). 77% chance to cast this spell after Frozen Armor is active (240/310).

Lightning:

– Level 17 Charged Bolt: 11.5 damage/bolt, 19 bolts total for 218.5 potential damage/cast. 60% chance to cast this spell.
– Level 29 Lightning: 258 damage/shot. 30% chance to cast this spell.

The lightning mercs are clearly lacking in damage output. Fire and cold mercs will deal significantly more damage, although the fire merc will have to hit multiple targets with each spell to reach his full potential. Overall, the cold merc may be the best choice with his Frozen Armor and Ice Blast.

Faster Cast Rate Breakpoints

Frames FCR%
18—– 0
17—– 10
16—– 15
15—– 30
14—– 40
13—– 60
12—– 90
11—–140

Hit Recovery Speeds

Frames FHR%
17—– 0
16—– 5
15—– 8
14—– 13
13—– 18
12—– 24
11—– 32
10—– 46
9—– 63
8—– 86
7—– 133
6—– 232
5—– 600

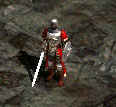
Act 5 Barbarian Mercenaries

(Only one type)

These mercs possess the skills Stun and Bash.

  • These are the only mercs who can use class-specific items (the barb helms)
  • “The act 5 mercanaries have a 5% chance of doing critical hits, the other mercanaries do not.” – Ruvanal
  • These mercs can complete the Sazabi Set.
  • They do not have or benefit from +sword mastery such as on Bloodletter
  • Act 5 mercs receive a 70% bonus to their poison resistance in all difficulties.” – Zath
  • “The Act 5 merc’s normal attack has 2 hits.” – Zath

Barbarian Mercenary Equipment

Big 2-handed sword – They do the listed damage for both 1 hand and 2 hand swords, so the 2 handers will almost always win out. Life leech, FHR, resistances, etc are also good. They’re about the same as A2 mercs except for the weapon differences.

Armor – always go for Ethereal with useful mods , the Runeword Stone is very useful and popular as well.

Helms – Tal Rashas mask is good at the start with its 10% Life Leach, when you find one upgrade to an Ethereal Crown of Theives. An Ethereal Shako wouldn’t go amiss either although you will need to socket this with some form of leach.

These Mercs should really have a minimum of 11-15% Life Leach to ensure they stay alive, as they are very zealous and tend to run off the screen to engage everything in sight.

Keep in mind that you cant leach off all monsters – for example the undead.

Damage Comparison (synergies)

Stun – the 1.2s = stunned for 1.2 second

Merc 
Level------Bash Damage -----------Stun Damage
1----------AR 20%,  Dam 55%------AR 15%, Dam 8% 1.2s
30--------AR 30%,  Dam 80%------AR 30%, Dam 24% 1.8s
50---------AR 60%,  Dam 145 ------AR 65%, Dam 72% 3.2s
75--------AR 95%,  Dam 225 -------AR 110 , Dam 128%4.5s
75 & 
+3 skills---AR 110, Dam 225 –------AR 125, Dam 152% 4.7s

Act 5 Barbarian Mercenary Hit Recovery Breakpoints

Frames FHR%
9—– 0
8—– 7
7—– 15
6—– 27
5—– 48
4—– 86
3—– 200

Diablo 2 Resurrected Acronyms, Terms and Abbreviations

This guide is meant to provide a comprehensive list of abbreviations, acronyms and terms used when playing Diablo 2 and Diablo II Resurrected.

Abbreviations in Alphabetical Order

  • 3D:  3 Diamond  Usually refers to a shield socketed with three perfect diamonds.
  • A1, A2:  Act 1, Act 2, etc.
  • AB:  Amazon Basin.
  • ABM:  Amazon Basin Member.
  • afaic:  As far as I’m concerned.
  • afaics:  As far as I can see.
  • afaik:  As far as I know.
  • afk:  Away from keyboard.
  • Ali Baba:  Blade of Ali Baba Exceptional Unique Tulwar.
  • alvl:  Affix Level.
  • Ama:  Amazon.
  • Amp:  Amplify Damage.  Necro curse to reduce enemies’ resistance to physical damage.
  • Ancients (AW):  The Ancients’ Way in Act 5.
  • Andy:  Andariel.  Act 1 super unique monster.
  • AoE:  Area of Effect.
  • AR:  Attack Rating.
  • Arkaine’s (Ark):  Arkaine’s Valor Elite Unique Balrog Skin.
  • Arreat’s:  Arreat’s Face Unique Slayer Guard.
  • AS:  Arreat Summit.  Battle.net’s website for D2.
  • Asn (asa, assy):  Assassin.
  • Atlantean:  The Atlantean Exceptional Unique Ancient Sword.
  • Atma’s:  Atma’s Scarab Unique Amulet.
  • BA:  Blessed Aim.  A Paladin offensive aura.
  • BA:  Bone Armor.  A Necromancer defensive skill on the Poison and Bone tree.
  • Baba (Barb):  Barbarian.
  • Bane:  Gladiator’s Bane Elite Unique Wire Fleece.
  • Baranar’s (Banana):  Baranar’s Star Elite Unique Devil Star.
  • Bartuc’s (Barts):  Bartuc’s Cut-Throat Unique Greater Talons.
  • Basher:  The Cranium Basher Elite Unique Thunder Maul.
  • BC (BCry):  Battle Cry.  A Barbarian warcry to decrease an enemy’s damage and defense.
  • BC (BCom):  Battle Command.  A Barbarian warcry to increase skill levels.
  • BG:  Blood Golem.
  • BH:  Blessed Hammer.  An attack skill on the Paladin Combat tree.
  • BK:  Bul-Kathos.  Usually refers to the Bul-Kathos set items, or the unique Bul-Kathos’ Wedding Band Ring.
  • BM:  Bad Manners.
  • B.net (Bnet):  Battle Net.  Blizzard’s game server for Diablo II.
  • BO:  Battle Orders.  Barbarian warcry to increase life and mana.
  • BoI:  Blades of Ice.
  • BoS:  Burst of Speed.
  • BP:  Bone Prison.  A Necromancer skill on the Poison and Bone tree.
  • brb:  Be right back.
  • brt:  Be right there.
  • btc:  Back to channel.
  • BS:  Blade Shield.
  • BS:  Bone Spirit.  A Necromancer attack skill.
  • btw:  By the way.
  • Burrito (Buriza):  Buriza-Do Kyanon Exceptional Unique Ballista.
  • BW:  Bone Wall.  A Necromancer skill on the Poison and Bone tree.
  • Cat 2:  Catacombs Level 2 in Act 1.
  • CB:  Charged Bolt.  Sorceress lighting tree attack skill.
  • C/C:  Claw/Claw.  Refers to an Assassin wielding dual claws.
  • CBF:  Cannot be frozen.
  • CCB:  Cruel Colossus Blade.
  • CCS:  Cruel Colossus Sword.
  • CB:  Crushing Blow.
  • CE:  Cold Enchanted.
  • CE:  Corpse Explosion.  A Necromancer attack skill on the Poison and Bone tree.
  • CG:  Clay Golem.
  • cg (grats):  Congratulations.
  • Chan?:  Go to channel.
  • Char:  Character.
  • CI:  Cold Immune.
  • CKN (Chu):  Chu-ko-nu.  Often refers specifically to the Demon Machine Exceptional Unique Chu-ko-nu Crossbow.
  • CL:  Chain Lightning.  Sorceress lightning tree attack skill.
  • clvl:  Character Level.
  • CM:  Claw Mastery.
  • CM:  Cold Mastery.
  • CM:  Community Member.  Any participant in the Amazon Basin community.
  • Conc:  Concentration.  A Paladin offensive aura to increase physical damage.
  • Conv:  Conviction.  A Paladin offensive aura to reduce enemy resistances.
  • CoS:  Cloak of Shadows.
  • CoT:  Claws of Thunder.
  • CP:  Crystalline Passage in Act 5.
  • CR:  Cold resistance.
  • Crit:  Critical Strike.
  • Cranium (C basher):  The Cranium Basher Elite Unique Thunder Maul.
  • C/S:  Claw/Shield.  Refers to an Assassin using a claw and shield.
  • CS:  Chaos Sanctuary in Act 4.
  • CS:  Cobra Strike.
  • CS:  Critical Strike.
  • CTH:  Chance to Hit.
  • CU:  Cursed.
  • Cube:  The Horadric Cube.
  • cya:  See you.
  • D2:  Diablo II.
  • D2M:  Damage to Mana.
  • dii:  dii.net.  A D2 reference and forum site.
  • D/A/E:  Dodge/Avoid/Evade.  Trio of Amazon defensive skills from the Passive and Magic skill tree.
  • DC:  Dragon Claw.
  • Decrep:  Decrepify.  A Necromancer curse that slows and weakens.
  • Def:  Defense.
  • DEX:  Dexterity.
  • DF:  Dragon Flight.
  • ding:  Player announcing they’ve just leveled.
  • Dmg:  Damage.
  • Doombringer (Doom):  Doombringer Elite Unique Champion Sword.
  • DR (DR%):  Damage Reduced.  Items with this mod reduce physical damage.
  • Dru (droolid):  Druid.
  • DS:  Deadly Strike.
  • DS:  Death Sentry.
  • DT:  Dragon Tail.
  • Dur 2:  Durance of Hate Level 2 in Act 3.
  • Eagle (Eaglehorn):  Eaglehorn Elite Unique Crusader Bow.
  • ED:  Enhanced Damage.  A mod that increases physical damage.
  • ED:  Enhanced Defense.  A mod that increases defense on an item.
  • ED/IAS:  Enhanced Damage/IAS.  Typically refers to a rare combination of mods on a jewel.
  • ENE:  Energy.
  • EF:  Extra Fast.
  • ES:  Energy Shield.  Sorceress lightning tree defensive skill.
  • ES:  Extra Strong.
  • Eth:  Ethereal.
  • EXP:  Experience.
  • Eye (EoE):  Eye of Etlitch Unique Amulet.
  • FA:  Freezing Arrow.  An attack skill on the Amazon Bow and Crossbow skill tree.
  • Face:  Arreat’s Face Unique Slayer Guard.
  • Fana:  Fanaticism.  A Paladin offensive aura to increase attack speed and physical damage.
  • FB:  Fireball.  Sorceress fire tree attack skill.
  • FBR:  Faster block rate.
  • FC:  Fire Claws.  A Druid shape shifting skill.
  • FCR:  Faster cast rate.
  • FE:  Fire Enchanted.
  • FG:  Fire Golem.
  • FHR:  Faster hit recovery.
  • FI:  Fire Immune.
  • Fists:  Magefist Unique Light Gauntlets.
  • FN:  Frost Nova.  Sorceress cold tree attack skill.
  • FoH:  Fist of the Heavens.  An attack skill on the Paladin Combat tree.
  • FoF:  Fists of Fire.  An Assassin attack skill on the martial arts tree.
  • FO:  Frozen Orb.  (Sometimes called just “Orb.”) Sorceress cold tree attack skill.
  • fps:  Frames per second.
  • FR:  Feral Rage.  A Druid shape shifting skill.
  • FR:  Fire Resistance.
  • Frosties:  Frostburn Unique Gauntlets.
  • FRW:  Faster Run/Walk.
  • FW:  Firewall.  Sorceress fire tree attack skill.
  • GA:  Guided Arrow.
  • Gaze:  Vampiregaze Exceptional Unique Grim Helm.
  • gc:  Grand charm.
  • gg:  Good game.
  • gfi:  Go for it.
  • gj:  Good job.
  • Grandfather (gf):  The Grandfather Elite Unique Colossus Blade.
  • GS:  Glacial Spike.  Sorceress cold tree attack skill.
  • GSA:  Goldstrike Arch Exceptional Unique Gothic Bow.
  • gtg:  Good to go (or Got to go).
  • Gull:  Gull Unique Dagger.
  • H:  Hell.  Typically abbreviated with an Act abbreviation (A2 H), or a Basin game name (abasinhch). The third and last level of difficulty in Diablo II.
  • Harley:  Harlequin Crest Elite Unique Shako.
  • HB:  Holy Bolt.  A Paladin combat skill.
  • hc:  Hard Core.
  • HCMTF:  Hit Causes Monster to Flee.
  • Hellslayer:  Hellslayer Elite Unique Decapitator.
  • Heph:  Hephasto the Armorer.  Act 4 super unique monster.
  • HF:  Holy Freeze.  A Paladin offensive aura to chill enemies.
  • HoBL:  Hand of Blessed Light Unique Divine Scepter.
  • Homunculus:  Homunculus Unique Hierophant Trophy.
  • Horn (Eaglehorn):  Eaglehorn Elite Unique Crusader Bow.
  • Hot:  Warning that a portal is dangerous to enter.
  • HoW:  Heart of Wolverine.  A Druid summoning skill.
  • HoZ:  Herald Of Zakarum Unique Gilded Shield.
  • HP:  Hit Points.
  • HS:  Holy Shield.  A Paladin combat skill to boost shield characteristics.
  • HS:  Holy Shock.
  • Jalal’s:  Jalal’s Mane Unique Totemic Mask.
  • IAS:  Increased Attack Speed.
  • ID:  Identify.
  • IG:  Iron Golem.
  • IIRC:  If I recall correctly.
  • IK Maul:  Immortal King’s Stone Crusher Set Ogre Maul.
  • ilvl:  Item Level.
  • IMHO:  In my humble opinion.
  • Immo:  Immolation Arrow.  An attack skill on the Amazon Bow and Crossbow tree.
  • IMO:  In my opinion.
  • Ire:  Skullder’s Ire Exceptional Unique Russet Armor.
  • IS:  Iron Skin.  A Barbarian mastery to increase defense.
  • ITD:  Ignore Target Defense.
  • Izzy:   Izual.  Act 4 super unique monster.
  • j/k:  Just kidding.
  • k:  Okay.
  • KB:  Knockback.
  • l337:  Elite.
  • LA:  Leap Attack.
  • lc:  Large charm.
  • LE:  Lightning Enchanted.
  • LEB:  Lightning Enchanted Boss.
  • LEM:  Lightning Enchanted monster.
  • LF:  Lightning Fury.  A skill on the Amazon Javelin and Spear tree.
  • LI:  Lightning Immune.
  • Lidless:  Lidless Wall Exceptional Unique Grim Shield.
  • Lightsabre:  Lightsabre Elite Unique Phase Blade.
  • LL:  Life Leech.
  • LM:  Lightning Mastery.
  • LoD:  Lord of Destruction.  The Diablo II expansion.
  • LoH:  Laying of Hands Disciple Set Bramble Mitts.
  • LOL:  Laughs out loud.
  • LR:  Lightning resistance.
  • LR:  Lower Resist.  Necro curse to reduce enemies’ magic resistance.
  • LS:  Lightning Sentry.
  • LS:  Lightning Strike.  A skill on the Amazon Javelin and Spear tree.
  • Lyc:  Lycander’s Aim Unique Ceremonial Bow.
  • MA:  Martial Arts.  Usually a description for an Assassin type of build, or reference to one of the Assassin skill trees.
  • Mara’s:  Mara’s Kaleidoscope Unique Amulet.
  • Mat:  Matriarchal bow.
  • MB:  Mana Burn.
  • MDR:  Magic Damage Reduced.  Items with this mod reduce magical damage.
  • Meph:  Mephisto.  Act 3 super unique monster.
  • Merc:  Mercenary.
  • MF:  Magic Find.
  • MI:  Magic Immune.
  • ML:  Mana Leech.
  • mlvl:  Monster Level.
  • Mod:  Modifier.  Adds a characteristic to an item such as a weapon or charm.
  • Mod:  Moderator.  An Amazon Basin member responsible for moderating a forum or channel.
  • Moser’s:  Moser’s Blessed Circle Exceptional Unique Round Shield.
  • MP:  Market Place.  Trading site for D2 at market.diabloii.net.
  • MP:  Multi-Player.
  • MPK:  Mana per kill.
  • MR:  Magic Resistant.
  • MS:  Multiple Shot.  An attack skill on the Amazon Bow and Crossbow tree.
  • MS:  Multi-Shot.  A mod available to boss monsters.
  • MSLE (MSLEB):  Multi-Shot Lightning Enchanted.
  • nbd:  No big deal.
  • Nec (necro):  Necromancer.
  • newb:  Newbie.
  • ng:  New game.
  • NM:  Nightmare.  The second level of difficulty in Diablo II.
  • nm (nvm):  Never mind.
  • n00b:  Newbie.
  • Norm:  Normal.  Usually refers to the first level of difficulty in Diablo II.
  • NR:  Natural Resistance.  A Barbarian mastery to increase resistance to magic damage.
  • NRG:  Energy.
  • Oak:  Oak Sage.  A Druid summoning skill.
  • Occy (Oculus):  The Oculus Unique Swirling Crystal.
  • OK:  Oblivion Knight.
  • OMG:  Oh my god.
  • OTOH:  On the other hand.
  • Pally (Pali):  Paladin.
  • PDR:  Physical Damage Reduction.
  • PI:  Physical Immune.  A monster immune to physical damage attack.
  • PK:   Player Killer.
  • PKK:  Player Killer Killer.  A player who kills player killers.
  • PN:  Poison Nova.  A Necromancer skill on the Poison and Bone tree.
  • PR:  Poison resistance.
  • PS:  Phoenix Strike.
  • PvM:  Player versus Monster.
  • PvP:  Player versus Player.
  • PW:  Password.
  • r:  Ready.  This is the standard signal among players in a group before triggering a monster urn/shrine or entering a particularly treacherous area.
  • Reaver (Messy Reaver):  Messerschmidt’s Reaver Elite Unique Champion Axe.
  • Req:  Requirement.
  • res:  Resurrect.
  • rl:  Real life.
  • RoF:  Rate of Fire.
  • RoF:  River of Flame in Act 4.
  • ROFL:  Rolling on the floor laughing.
  • sc:  Small charm.
  • sc:  Soft core.
  • Schaefer’s:  Schaefer’s Hammer Elite Unique Legendary Mallet.
  • SD:  Shadow Disciplines.  One of the Assassin skill trees.
  • Sec:  Hang on a second.
  • SF:  Static Field.  Sorceress lighting tree attack skill.
  • Shaft:  Shaftstop Exceptional Unique Mesh Armor.
  • Shako:  Harlequin Crest Elite Unique Shako.  (Technically, a Shako is the entire class of elite Shako helms, but the term almost always refers to its Unique version.)
  • Silks:  Silks of the Victor Unique Ancient Armor.
  • Sin (Sinner):  Assassin.
  • Skullder’s:  Skullder’s Ire Exceptional Unique Russet Armor.
  • Slow:  Slows Target.  Item mod that slows enemies.
  • slvl:  Skill Level.
  • SM (Master):  Shadow Master.
  • SM:  Slow Missiles.  A skill on the Amazon Passive and Magic tree.
  • SoJ:  Stone of Jordan Unique Ring.
  • Sorc (socer):  Sorceress.
  • SH (Spec):  Spectral Hit.
  • SP:  Single Player.  Usually refers to single-player mode of Diablo II.
  • Spear:  Bone Spear.  A Necromancer attack skill.
  • Spike:  Wizardspike Elite Unique Bone Knife.
  • Spirit:  Bone Spirit.  A Necromancer attack skill.
  • SS:  Stone Skin.
  • S/S:  Sword/Shield.
  • SS (Storm):  Stormshield Elite Unique Monarch Shield.
  • Stormspire:  Stormspire Elite Unique Giant Thresher.
  • STR:  Strength.
  • String (SoE):  String of Ears Exceptional Unique Demonhide Sash.
  • SW (Warrior):  Shadow Warrior.
  • SW:  Shock Wave.  A Druid shape shifting skill.
  • Tal’s Orb:  Tal Rasha’s Lidless Eye Set Swirling Crystal.
  • Tarn:  Tarnhelm Unique Skull Cap.
  • TE (Tele):  Teleport.
  • thx:  Thanks.
  • TGod (TGV):  Thundergod’s Vigor Exceptional Unique War Belt.
  • Tiamat’s:  Tiamat’s Rebuke Exceptional Unique Dragon Shield.
  • Titan’s:  Titan’s Revenge Unique Ceremonial Javelin.
  • TK:  Telekinesis.
  • TP:  Town Portal.
  • TP:  Teleport.  A Sorceress skill on the lightning tree.
  • TPJ:  Thomas Penfield Jackson.  Founder of the Amazon Basin.
  • Trav:  Travincal in Act 3.
  • TS:  Thunderstorm.  Sorceress lighting tree attack skill.
  • TS:  Tiger Strike.
  • ttyl:  Talk to you later.
  • Tucs:  Bartuc’s Cut-Throat Unique Greater Talons.
  • Twitch:  Twitchthroe Unique Studded Leather Armor.
  • ty:  Thank you.
  • tyt:  Take your time.
  • tyvm:  Thank you very much.
  • Ume’s:  Ume’s Lament Unique Grave Wand.
  • Valk:  Valkyrie.  A skill on the Amazon Passive and Magic tree.
  • Valor:  Arkaine’s Valor Elite Unique Balrog Skin.
  • Vamp:  Vampiregaze Exceptional Unique Grim Helm.
  • VIT:  Vitality.
  • w8:  Wait.
  • wb:  Welcome back.
  • WC:  War Cry.  A Barbarian warcry.
  • WF (Windforce):  Windforce Elite Unique Hydra Bow.
  • Wizardspike:  Wizardspike Elite Unique Bone Knife.
  • WoF:  Wake of Fire.
  • WoI:  Wake of Inferno.
  • Wote (WOE):  Wall of the Eyeless Unique Bone Shield.
  • WP:  Waypoint.
  • WSK (WK2):  Worldstone Keep Level 2 in Act 5.
  • WT:  WeaselTech.
  • WB:  WereBear.  A Druid shape shifting skill.
  • WW:  WereWolf.  A Druid shape shifting skill.
  • WW:  Whirlwind.  A Barbarian combat skill.
  • WWS:  Witchwild String Exceptional Unique Short Siege Bow.
  • YMMV:  Your mileage may vary.
  • y:  Yes.
  • yw:  You’re welcome.
  • Zerk:  Berzerk.  A Barbarian combat skill.
  • Zon:  Amazon.

Abbreviations by Category

Amazon Basin Abbreviations

  • ABM:  Amazon Basin Member.
  • CM:  Community Member.  Any participant in the Amazon Basin community.
  • TPJ:  Thomas Penfield Jackson.  Founder of the Amazon Basin.
  • WT:  WeaselTech.

Conversational Abbreviations

  • afaic:  As far as I’m concerned.
  • afaics:  As far as I can see.
  • afaik:  As far as I know.
  • afk:  Away from keyboard.
  • brb:  Be right back.
  • brt:  Be right there.
  • btc:  Back to channel.
  • btw:  By the way.
  • Chan?:  Go to channel.
  • cg (grats):  Congratulations.
  • cya:  See you.
  • ding:  Player announcing they’ve just leveled.
  • gfi:  Go for it.
  • gg:  Good game.
  • gj:  Good job.
  • gtg:  Good to go (or Got to go).
  • j/k:  Just kidding.
  • IIRC:  If I recall correctly.
  • IMHO:  In my humble opinion.
  • IMO:  In my opinion.
  • k:  Okay.
  • LOL:  Laughs out loud.
  • nbd:  No big deal.
  • ng:  New game.
  • nm (nvm):  Never mind.
  • np:  No problem.
  • OMG:  Oh my god.
  • OTOH:  On the other hand.
  • r:  Ready.  This is the standard signal among players in a group before triggering a monster urn/shrine or entering a particularly treacherous area.
  • rl:  Real life.
  • ROFL:  Rolling on the floor laughing.
  • Sec:  Hang on a second.
  • thx:  Thanks.
  • ttyl:  Talk to you later.
  • ty:  Thank you.
  • tyt:  Take your time.
  • tyvm:  Thank you very much.
  • w8:  Wait.
  • wb:  Welcome back.
  • YMMV:  Your mileage may vary.
  • y:  Yes.
  • yw:  You’re welcome.

In-Game Abbreviations

  • Ancients (AW):  The Ancients’ Way in Act 5.
  • BA:  Blessed Aim.
  • BO:  Battle Orders.  Barbarian warcry to increase life and mana.
  • Cat 2:  Catacombs Level 2 in Act 1.
  • CE:  Cold Enchanted.
  • CI:  Cold Immune.
  • Conv:  Conviction.
  • CP:  Crystalline Passage in Act 5.
  • CS:  Chaos Sanctuary in Act 4.
  • CU:  Cursed.
  • Dur 2:  Durance of Hate Level 2 in Act 3.
  • EF:  Extra Fast.
  • ES:  Extra Strong.
  • Fana:  Fanaticism.
  • FE:  Fire Enchanted.
  • FI:  Fire Immune.
  • HS:  Holy Shock.
  • LE:  Lightning Enchanted.
  • LEB:  Lightning Enchanted Boss.
  • LI:  Lightning Immune.
  • MB:  Mana Burn.
  • MI:  Magic Immune.
  • MR:  Magic Resistant.
  • MS:  Multi-Shot.  A mod available to boss monsters.
  • MSLE (MSLEB):  Multi-Shot Lightning Enchanted.
  • PI:  Physical Immune.  A monster immune to physical damage attack.
  • r:  Ready.  This is the standard signal among players in a group before triggering a monster urn/shrine or entering a particularly treacherous area.
  • RoF:  River of Flame in Act 4.
  • SH (Spec):  Spectral Hit.
  • TE (Tele):  Teleport.
  • TP:  Town Portal.
  • Trav:  Travincal in Act 3.
  • WP:  Waypoint.
  • WSK (WK2):  Worldstone Keep Level 2 in Act 5.

Amazon Abbreviations

  • Ama:  Amazon.
  • CS:  Critical Strike.  Damage enhancing skill on the Passive and Magic tree.
  • D/A/E:  Dodge/Avoid/Evade.  Trio of Amazon defensive skills from the Passive and Magic tree.
  • FA:  Freezing Arrow.  An attack skill on the Amazon Bow and Crossbow tree.
  • GA:  Guided Arrow.  An attack skill on the Amazon Bow and Crossbow tree.
  • Immo:  Immolation Arrow.  An attack skill on the Bow and Crossbow tree.
  • LF:  Lightning Fury.  A skill on the Amazon Javelin and Spear tree.
  • LS:  Lightning Strike.  A skill on the Amazon Javelin and Spear tree.
  • MS:  Multiple Shot.  An attack skill on the Amazon Bow and Crossbow tree.
  • SM:  Slow Missiles.  A skill on the Amazon Passive and Magic tree.
  • Valk:  Valkyrie.  A skill on the Amazon Passive and Magic tree.
  • Zon:  Amazon.

Assassin Abbreviations

  • Asn (asa, assy):  Assassin.
  • BS:  Blade Shield.
  • BoI:  Blades of Ice.
  • BoS:  Burst of Speed.
  • C/C:  Claw/Claw.  Refers to an Assassin wielding dual claws.
  • C/S:  Claw/Shield.  Refers to an Assassin using a claw and shield.
  • CM:  Claw Mastery.
  • CoS:  Cloak of Shadows.
  • CoT:  Claws of Thunder.
  • CS:  Cobra Strike.
  • DC:  Dragon Claw.
  • DF:  Dragon Flight.
  • DS:  Death Sentry.
  • DT:  Dragon Tail.
  • FoF:  Fists of Fire.
  • LS:  Lightning Sentry.
  • MA:  Martial Arts.  Usually a reference either to an Assassin type of build, or reference to one of the Assassin skill trees.
  • PS:  Phoenix Strike.
  • SD:  Shadow Disciplines.  One of the Assassin skill trees.
  • Sin (Sinner):  Assassin.
  • SM (Master):  Shadow Master.
  • SW (Warrior):  Shadow Warrior.
  • TS:  Tiger Strike.
  • WoF:  Wake of Fire.
  • WoI:  Wake of Inferno.

Barbarian Abbreviations

  • Baba (Barb):  Barbarian.
  • BC (BCry):  Battle Cry.  A Barbarian warcry to decrease an enemy’s damage and defense.
  • BC (BCom):  Battle Command.  A Barbarian warcry to increase skill levels.
  • BO:  Battle Orders.  Barbarian warcry to increase life and mana.
  • IS:  Iron Skin.  A Barbarian mastery to increase defense.
  • LA:  Leap Attack.
  • NR:  Natural Resistance.  A Barbarian mastery to increase resistance to magic damage.
  • S/S:  Sword/Shield.
  • WC:  War Cry.  A Barbarian warcry.
  • WW:  Whirlwind.  A Barbarian combat skill.
  • Zerk:  Berzerk.  A Barbarian combat skill.

Druid Abbreviations

  • FC:  Fire Claws.  A Druid shape shifting skill.
  • FR:  Feral Rage.  A Druid shape shifting skill.
  • HoW:  Heart of Wolverine.  A Druid summoning skill.
  • Oak:  Oak Sage.  A Druid summoning skill.
  • SW:  Shock Wave.  A Druid shape shifting skill.
  • WB:  WereBear.  A Druid shape shifting skill.
  • WW:  WereWolf.  A Druid shape shifting skill.

Necromancer Abbreviations

  • Amp:  Amplify Damage.  A curse to reduce enemies’ resistance to physical damage.
  • BA:  Bone Armor.  A Necromancer defensive skill on the Poison and Bone tree.
  • BG:  Blood Golem.
  • BP:  Bone Prison.  A Necromancer skill on the Poison and Bone tree.
  • BS:  Bone Spirit.  A Necromancer attack skill.
  • BW:  Bone Wall.  A Necromancer skill on the Poison and Bone tree.
  • CE:  Corpse Explosion.  A Necromancer attack skill on the Poison and Bone tree.
  • CG:  Clay Golem.
  • Decrep:  Decrepify.  A Necromancer curse that slows and weakens.
  • FG:  Fire Golem.
  • IG:  Iron Golem.
  • IM:   Iron Maiden.  A curse that magnifies and returns damage inflicted.
  • LR:  Lower Resist.  A Necromancer curse to reduce enemies’ magic resistance.
  • Nec (necro):  Necromancer.
  • PN:  Poison Nova.  A Necromancer skill on the Poison and Bone tree.
  • Spear:  Bone Spear.  A Necromancer attack skill.
  • Spirit:  Bone Spirit.  A Necromancer attack skill.

Paladin Abbreviations

  • BA:  Blessed Aim.  A Paladin offensive aura.
  • BH:  Blessed Hammer.  An attack skill on the Paladin Combat tree.
  • Conc:  Concentration.  A Paladin offensive aura to increase physical damage.
  • Conv:  Conviction.  A Paladin offensive aura to reduce enemy resistances.
  • Fana:  Fanaticism.  A Paladin offensive aura to increase attack speed and physical damage.
  • FoH:  Fist of the Heavens.  An attack skill on the Paladin Combat tree.
  • HB:  Holy Bolt.  A Paladin combat skill.
  • HF:  Holy Freeze.  A Paladin offensive aura to chill enemies.
  • HS:  Holy Shield.  A Paladin combat skill to boost shield characteristics.
  • Pally (Pali):  Paladin.

Sorceress Abbreviations

  • CB:  Charged Bolt.  Sorceress lighting tree attack skill.
  • CL:  Chain Lightning.  Sorceress lightning tree attack skill.
  • CM:  Cold Mastery.
  • ES:  Energy Shield.  Sorceress lightning tree defensive skill.
  • FB:  Fireball.  Sorceress fire tree attack skill.
  • FN:  Frost Nova.  Sorceress cold tree attack skill.
  • FM:   Fire Mastery.
  • FO:  Frozen Orb.  (Sometimes called just “Orb.”) Sorceress cold tree attack skill.
  • FW:  Firewall.  Sorceress fire tree attack skill.
  • GS:  Glacial Spike.  Sorceress cold tree attack skill.
  • LM:  Lightning Mastery.
  • Sorc (socer):  Sorceress.
  • SF:  Static Field.  Sorceress lighting tree attack skill.
  • Tele:  Teleport.
  • TK:  Telekinesis.
  • TS:  Thunderstorm.  Sorceress lighting tree attack skill.

Statistical Abbreviations

  • alvl:  Affix Level.
  • AR:  Attack Rating.
  • clvl:  Character Level.
  • CTH:  Chance to Hit.
  • Def:  Defense.
  • DR (DR%):  Damage Reduced.  Items with this mod reduce physical damage.
  • ED:  Enhanced Damage.  A mod that increases physical damage.
  • ED:  Enhanced Defense.  A mod that increases defense on an item.
  • ilvl:  Item Level.
  • mlvl:  Monster Level.
  • PDR:  Physical Damage Reduction.
  • slvl:  Skill Level.

Item Abbreviations

  • Ali Baba:  Blade of Ali Baba Exceptional Unique Tulwar.
  • Arkaine’s (Ark):  Arkaine’s Valor Elite Unique Balrog Skin.
  • Arreat’s:  Arreat’s Face Unique Slayer Guard.
  • Atma’s:  Atma’s Scarab Unique Amulet.
  • Atlantean:  The Atlantean Exceptional Unique Ancient Sword.
  • Bane:  Gladiator’s Bane Elite Unique Wire Fleece.
  • Baranar’s (Banana):  Baranar’s Star Elite Unique Devil Star.
  • Bartuc’s (Barts):  Bartuc’s Cut-Throat Unique Greater Talons.
  • Basher:  The Cranium Basher Elite Unique Thunder Maul.
  • BK:  Bul-Kathos.  Usually refers to the Bul-Kathos set items, or the unique Bul-Kathos’ Wedding Band Ring.
  • Burrito (Buriza):  Buriza-Do Kyanon Exceptional Unique Ballista.
  • CCB:  Cruel Colossus Blade.
  • CCS:  Cruel Colossus Sword.
  • CKN (Chu):  Chu-ko-nu.  Often refers specifically to the Demon Machine Exceptional Unique Chu-ko-nu Crossbow.
  • Cranium (C basher):  The Cranium Basher Elite Unique Thunder Maul.
  • Doombringer (Doom):  Doombringer Elite Unique Champion Sword.
  • Eagle (Eaglehorn):  Eaglehorn Elite Unique Crusader Bow.
  • Eye (EoE):  Eye of Etlitch Unique Amulet.
  • Face:  Arreat’s Face Unique Slayer Guard.
  • Fists:  Magefist Unique Light Gauntlets.
  • Frosties:  Frostburn Unique Gauntlets.
  • Gaze:  Vampiregaze Exceptional Unique Grim Helm.
  • gc:  Grand charm.
  • Grandfather (gf):  The Grandfather Elite Unique Colossus Blade.
  • GSA:  Goldstrike Arch Exceptional Unique Gothic Bow.
  • Gull:  Gull Unique Dagger.
  • Harley:  Harlequin Crest Elite Unique Shako.
  • Hellslayer:  Hellslayer Elite Unique Decapitator.
  • HoBL:  Hand of Blessed Light Unique Divine Scepter.
  • Homunculus:  Homunculus Unique Hierophant Trophy.
  • Horn (Eaglehorn):  Eaglehorn Elite Unique Crusader Bow.
  • HoZ:  Herald Of Zakarum Unique Gilded Shield.
  • IK Maul:  Immortal King’s Stone Crusher Set Ogre Maul.
  • Ire:  Skullder’s Ire Exceptional Unique Russet Armor.
  • Jalal’s:  Jalal’s Mane Unique Totemic Mask.
  • lc:  Large charm.
  • Lidless:  Lidless Wall Exceptional Unique Grim Shield.
  • Lightsabre:  Lightsabre Elite Unique Phase Blade.
  • LoH:  Laying of Hands Disciple Set Bramble Mitts.
  • Lyc:  Lycander’s Aim Unique Ceremonial Bow.
  • Mara’s:  Mara’s Kaleidoscope Unique Amulet.
  • Mat:  Matriarchal bow.
  • Moser’s:  Moser’s Blessed Circle Exceptional Unique Round Shield.
  • Occy (Oculus):  The Oculus Unique Swirling Crystal.
  • Reaver (Messy Reaver):  Messerschmidt’s Reaver Elite Unique Champion Axe.
  • sc:  Small charm.
  • Schaefer’s:  Schaefer’s Hammer Elite Unique Legendary Mallet.
  • Shaft:  Shaftstop Exceptional Unique Mesh Armor.
  • Shako:  Harlequin Crest Elite Unique Shako.  (Technically, a Shako is the entire class of elite Shako helms, but the term almost always refers to its Unique version.)
  • Silks:  Silks of the Victor Unique Ancient Armor.
  • Skullder’s:  Skullder’s Ire Exceptional Unique Russet Armor.
  • SoJ:  Stone of Jordan Unique Ring.
  • SS (Storm):  Stormshield Elite Unique Monarch Shield.
  • Stormspire:  Stormspire Elite Unique Giant Thresher.
  • String (SoE):  String of Ears Exceptional Unique Demonhide Sash.
  • Tal’s Orb:  Tal Rasha’s Lidless Eye Set Swirling Crystal.
  • Tarn:  Tarnhelm Unique Skull Cap.
  • TGod (TGV):  Thundergod’s Vigor Exceptional Unique War Belt.
  • Tiamat’s:  Tiamat’s Rebuke Exceptional Unique Dragon Shield.
  • Titan’s:  Titan’s Revenge Unique Ceremonial Javelin.
  • Tucs:  Bartuc’s Cut-Throat Unique Greater Talons.
  • Twitch:  Twitchthroe Unique Studded Leather Armor.
  • Ume’s:  Ume’s Lament Unique Grave Wand.
  • Valor:  Arkaine’s Valor Elite Unique Balrog Skin.
  • Vamp:  Vampiregaze Exceptional Unique Grim Helm.
  • WF (Windforce):  Windforce Elite Unique Hydra Bow.
  • Wizardspike:  Wizardspike Elite Unique Bone Knife.
  • Wote (WOE):  Wall of the Eyeless Unique Bone Shield.
  • WWS:  Witchwild String Exceptional Unique Short Siege Bow.

Black Morass Attunement Guide (TBC)

The attunement process for The Black Morass is a quest chain that has you complete one run of Old Hillsbrad Foothills. So the best place to start is getting a group together to run Old Hillsbrad Foothills in the Caverns of Time.

  1. Pick up the quest To The Master’s Lair

    Once you enter the Caverns of Time, you need to talk to the Steward of Time. After talking to the Steward of Time, you will talk to Andormu.

  2. Turn in To The Master’s Lair and accept The Caverns of Time

    After you talk to Andormu, you can turn in To The Master’s Lair and then accept the quest The Caverns of Time. Carefully follow the NPC around until your quest finishes. If you get too far away you will have to restart and this quest takes a long time.

  3. Return to Andormu and turn in The Caverns of Time

    Once you turn in The Caverns of Time, Andormu will give you the quest Old Hillsbrad. At this point you want to get your group together and enter Old Hillbrad Foothills.

  4. Enter Old Hillsbrad Foothills and speak to Erozion

    Once you enter Old Hillsbrad Foothills, travel through the tunnel and then speak to Erozion at the end to turn in Old Hillsbrad.

  5. Erozion will give you the quest Taretha’s Diversion.

    After speaking to Erozion he will give you the quest Taretha’s Diversion. He will also give you a Pack of Incendiary Bombs which are needed to light buildings on fire.

  6. Use the dragon nearby to fly to the kee

    Talk to the dragon near Erozion to fly to the keep.

  7. Burn the buildings inside of the keep.

    Make your way to the lower level and set all 5 of the buildings on fire. Inside of each building, you will find a barrel you can place your Pack of Incendiary Bombs into.

  8. Enter the keep and talk to Thrall

    After burning all of the buildings proceed up the hill and enter the keep. Once inside, make your way down the staircase to the jail containing Thrall.

  9. Have everyone in your party pick up the quest.

    Once you talk to Thrall make sure everyone in your party has the quest before anyone begins it. Otherwise it will start and party members won’t receive credit.

  10. Accept Escape from Durnholde and follow Thrall to Tarren Mill.

    Once everyone has the quest, initiate the quest and escort Thrall to Tarren Mill. Keep him safe by killing enemies that spawn around him.

  11. Kill the final boss and watch the cutscene

    After you finish escorting Thrall the final boss will spawn. Once you kill him you will get to watch a cut scene to complete the quest.

  12. Return to the entrance

    After you have killed the final boss and completed your quest, return to Erozion at the entrance and turn the quest in. Next you will pick up Return to Andormu.

  13. Turn in Return to Andormu

    After talking to Erozion, exit Old Hillsbrad and talk to Andormu outside. Once you turn in Return to Andormu he will give you a new quest, The Black Morass. Once you have this quest in hand, you can run Black Morass!

    Congratulations!

Karazhan Attunement Guide

Kharazhan is the first raid in the Burning Crusade expansion of World of Warcraft. Karazhan can be found in the Deadwind Pass, which is located east of Duskwood. Kharazhan has 11 boss encounters inside of a haunted castle. Usually, guilds break the raid up into two parts, the front half and the back half.

The entire Kharazhan attunement process is one long quest chain. The catch will be that you have to do many dungeons along the way, which can make this process very time-consuming. Due to this, it will help to have a flying mount. If you do not have a flying mount, you will need a warlock to summon you into the Arcatraz.

Below we are going to walk through the entire process and if you follow this guide from beginning to end, you will be attuned with Karazhan before you know it!

Beginning Quests

First we will need to pick up two quests from Archmage Alturus and venture into the underground area right in front of Karazhan. These two quests are pretty quick and easy.

Restless activity

This quest will require you to obtain 10 Ghostly Essence by killing ghostly creatures. Ideally, you complete this quest while working on Arcane Disturbances.

Arcane Disturbances

The second quest you will need to start the Karazhan attunement quest chain is Arcane Disturbances.

You pick this quest up from Archmage Alturus. Who is located just outside of the front entrance of Karazhan. Again, you will want to pick up Restless activity from him at the same time.

Once you accept Arcane Disturbances., you will receive a Violet Scrying Crystal. After you get the  Violet Scrying Crystal follow the path away from the locked door of Karazhan. Take the first path off to the right and you will find 2 ruined buildings. Each of these buildings has stairs that lead down to an underground area.

Underground Well

If you enter the underground area on the left side of the path, you will need to continue down the ramp until you reach a big open room with a small pit inside. After that, head to your right through a hallway into a second big open room. The well will be inside of that room. Simply use the Violet Scrying Crystal near this underground well to complete your task here. After completing this object you can either exit and re-enter from the right side or wander around in the cave system until you find the underground pond.

Underground Water

If you enter the underground area from the right side, you need to continue through the underground area until you find a large open room. On your left, there will be a pool of underground water. Use your Violet Scrying Crysta while standing next to the pool to complete this final objective.

After that is complete, finish up Restless activity and then head back to Archmage Alturus to turn in both quests.

Contact from Dalaran

After turning in the previous two quests, Archmage Alturus will give you the quest Contact from Dalaran. This quest will require you to visit the Dalaran Crater in Alterac Mountains.

Once at the crater you will need to speak with Archmage Cedric. He will be standing next to a broken down house near Lordamere Lake.

Archmage Alturus

Once you talk with Archmage Cedric he will give you the quest Khadgar and send you on your way.

Khadgar

The final introductory quest is Khadgar, this quest just requires you to speak with Khadgar in Shattrath City. Khadgar will be standing in the center of the city right beside A’dal.

Khadgar

Once you speak to Khadgar he will give you the quest Entry Into Karazhan. This is a group quest which requires running the dungeon Shadow Labyrinth.

First Key Fragment

  1. The first thing you will have to do at this point is to get the Shadow Labyrinth Key from Sethekk Halls. This key comes from the chest after you kill the last boss. After killing Talon King Ikiss and looting the Shadow Labyrinth Key it will be time to run Shadow Labs.
  2. Proceed through Shadow Labs and kill Murmur at the end. Take note that this is a pretty difficult fight, so your party needs to be pretty solid.
  3. After you kill Murmur you will have to fight a Fragment Guardian. Give your party some time to rest and then click on the arcane container in the back of the room. This will trigger the Fragment Guardian to spawn.
  4. Once the guardian has been killed, grab the First Key Fragment and head back to Khadgar in Shattrath City.
  5. Khadgar will give you the quest The Second and Third Fragments and we are off to get the second key fragment.

Second Key Fragment

Once you have the The Second and Third Fragments quest, it will be time to head into Steam Vaults!

You don’t actually have to run the entire Steamvault dungeon to get the second key fragment. The arcane container is under water right next to the first boss. You will need a party to kill the Second Fragment Guardian but it isn’t too difficult.

Arcane Container

Third Key Fragment

The last key fragment is located inside of The Arcatraz dungeon. This is one of, if not, the hardest dungeon in the Burning Crusade. You will need a very good group to get through this dungeon.

To get in this dungeon, you will need a flying mount and the Key to the Arcatraz. If you do not have the key, someone else can open the door for you but you will have to make sure someone in your party has the key. Rogues can also pickpocket the door with level 350 pickpocketing.

Once you are inside of The Arcatraz, you will kill the first boss, Zereketh the Unbound, and then continue through the dungeon until you enter a large room full of voidwalkers called Negaton Warp-Master. Once inside that room you will see an Arcane Container on the north-east side of the room. Interacting with that container will spawn the Third Fragment Guardian. Once you kill him you will be able to loot the Third Key Fragment and complete the quest.

To complete the quest return to Khadgar in Shattrath.

The Master’s Key

Khadgar will give you the quest The Master’s Touch which requires you to run The Black Morass

You will have to be attuned for The Black Morass at this point. It’s very important to make sure everyone in your group is attuned or you could end up wasting a lot of time…

After entering The Black Morass you will complete the dungeon as normal by talking to Medivh and then fighting off waves of enemies. After you defeat Aeonus, the final boss, speak to Medivh again and he will complete your quest.

Medivh will give you the quest Return to Khadgar and you simply need to return to Khadgar and pick up your The Master’s Key. At this point you will be able to attuned for Karazhan!!

Congratulations!

FAQ

What is the first quest in the Karazhan questline?

The first quest to begin the Karazhan attunement questline is Contact from Dalaran.

Where do you get the first key fragment?

The first key fragment comes from the Shadow Labyrinth dungeon.

Does Karazhan require attunement?

Yes, Karazhan does require you to be attuned in TBC.

Who gives you the key to Karazhan

Khadgar in Shattrath City gives you the Key to Karazhan.

What is the key to Karazhan called?

The Master’s Key is the key used to open the gate to Karazhan

post

Burning Crusade Classic mount cost and level requirements

Mount prices and level requirements in TBC

Getting your first mount is one of the best feelings in the World of Warcraft! It is one of the most crucial parts of the leveling process and helps tremendously with getting around the world. With the launch of Burning Crusade Classic, that brings up a lot of questions about how much your mount will cost and what the level requirements will be to ride it. Today I wanted to spend some time answering all of your questions regarding mount prices, speeds and level requirements.

Slow Ground Mount

Your first mount can be bought at level 30 in Burning Crusade Classic. This was an interesting decision because previously this level requirement wasn’t lowered until the end of the Burning Crusade expansion.

Slow Mount


This Mount is typically called your “slow mount” because it only adds an extra 60% movement speed instead of the 100% that the “fast ground mount” adds. While it is the “slow mount” it will feel amazing when you are no longer walking!

The riding skill to use the slow mount will cost 35 gold (before any faction discounts) and require level 30. The mount itself will cost an additional 9 gold.

Slow Riding

Fast Ground Mount

Your next mount can be bought at level 60 in the Burning Crusade expansion. This new mount is a huge improvement over the much slower first ground mount.

Fast Mount

This mount gives you an extra 100% movement speed and is a lot of fun to ride!

The riding skill to use the fast mount will cost 600 gold before any reputation-based discounts. The Journeyman riding skill will require you to be level 60. The bulk of the price will be in the riding skill but the mount itself will cost an additional 90 gold.

Fast Riding

Slow Flying Mount

Your next mount will be the slow flying mount. This mount only adds an additional 60% movement speed. To learn Expert Riding which is required to ride this mount you will need to be level 70. The only exception to this will be Druids. Druids can slow fly at level 68 when they get flight form.

Expert Riding will cost 800 gold and then you will need to spend an additional 100 gold to buy the mount. This sounds like a pricey endeavor for a slow mount but it is well worth it.

This mount will allow you to farm the elemental plateau and do additional daily quests. The mount can also help you get to places quicker because you can fly over obstacles and go in a straight line.

Slow Flying

Fast Flying Mount

Alright, so you have saved up your 5000 gold and are ready to party with the big boys and girls. This is the big one! Once you unlock Artisan Riding you are ready to spend an additional 200 gold to buy a fast flying mount and own the skys!

This fast flying mount moves at 280% movement speed and soars through the sky! This mount is well worth the investment if you can gather up the gold but 5200 gold isn’t the easiest thing in the world to come by.

Fast Flying


FAQ

When do you get your first mount in Burning Crusade Classic?

In TBC Classic, you get your first mount at level 30

How much does level 30 riding cost in Burning Crusade Classic?

Your first riding skill in TBC Classic will cost 35 gold without any discounts.

When do you get your fast ground mount in TBC Classic?

You can learn fast riding at level 60

How much does level 60 riding cost in Burning Crusade Classic?

Level 60 riding skill in Burning Crusade Classic costs 600 gold without any reputation discounts.

When can you fly in TBC Classic?

You can buy slow flying at level 70 in TBC Classic. Druids can actually get flight form at level 68.

How much is slow flying in Burning Crusade Classic?

Slow flying will cost 800 gold in TBC Classic!

How fast is slow flying in Burning Crusade Classic?

Your “slow flying” or “cheap flying” in TBC Classic increases your movement speed by 60%

How much is fast flying in Burning Crusade Classic?

Fast flying is 5000 gold in Burning Crusade Classic.

TBC Racial traits and information

Racial traits are special abilities and powers granted to characters in World of Warcraft based on their race. These racial traits come in both active and passive forms. Each unique race receives 4 racial traits in the Burning Crusade expansion. (Several of these will be passive and at least one will be active per race).

Some things to note:

  • Forsaken characters are considered as Humanoid’s rather than as Undead.
  • Priests also gain two more active traits, their very own Priest racial abilities.

Alliance

Dwarf

Stoneform

Activate to gain immunity to poison, disease, and bleed; +10% Armor; Lasts 8 seconds. 3 minute cooldown.

Gun Specialization

increases chance to critically hit with Guns by 1% as of Patch 2.3 (was increase Gun Skill by 5).

Frost Resistance

Increase Frost Resistance by 10.

Find Treasure

Activate to see treasure chests on mini map – lasts until canceled – no cooldown.
Treasure finding also marks many “node-type” quest items on the mini map.

Gnome

Escape Artist

Escape the effects of any immobilization or movement speed reduction effect. Instant cast. 1 min, 45 sec cooldown as of Patch 2.3 (was 1 min).

Expansive Mind

Increase Intellect by 5%.

Arcane Resistance

Increase Arcane Resistance by 10.

Engineering Specialist

15 point skill bonus to Engineering (note, this also raises the cap by 15 at each level of Engineering).

Human

Perception

Activate to increase stealth detection radius. Lasts 20 seconds, 3 minute cooldown.

The Human Spirit

Increase spirit by 10%.

Diplomacy

10% bonus to faction point gain.

Sword and Mace Specialization

Increases expertise with maces, two-handed maces, swords, and two-handed swords by 5.

Night elf

Shadowmeld

Activate while immobile and out of combat to enter stealth mode. Movement or damage cancels Shadowmeld.
Passively boosts stealth mode of rogues and druids.

Quickness

Dodge chance increased by 1%.

Wisp Spirit

Become a wisp when dead with 50% movement speed increase.

Nature Resistance

Increase Nature Resistance by 10.

Draenei

Gift of the Naaru

Activate to heal your target for 35 + 15 per Level over 15 sec – 40 yd range – 1.5 sec cast – 3 min cooldown. (At level 1 it heals 50 health, and 1085 at level 70)

Heroic Presence

Increases chance to hit by 1% for you and all party members within 30 yards. (Warriors, Paladins, and Hunters)

Inspiring Presence

Increases chance to hit with spells by 1% for you and all party members within 30 yards. (Priests, Mages, and Shaman)

Gemcutting

5 point skill bonus to Jewelcrafting (note, this also raises the cap by 5 at each level of jewelcrafting).

Shadow Resistance

Increase Shadow Resistance by 10.

Horde

Orc

Blood Fury

Activate to increase attack power and spell damage/healing by an amount based on level/class for 15 seconds, decreasing healing done to the user by 50% for the duration. 2 minute cooldown.

Hardiness

Increase resistance to stun effects by 15%.

Command

Damage done by Hunter and Warlock pets increased by 5%.

Axe Specialization

Expertise with One- and Two-handed Axes increased by 5.

Tauren

War Stomp

Activate to stun opponents – Stuns up to 5 enemies within 8 yards for 2 seconds. 2 minute cooldown.

Endurance

Hitpoints increased by 5%.

Cultivation

15 point skill bonus to Herbalism (note, this also raises the cap by 15 at each level of herbalism).

Nature Resistance

Increase Nature Resistance by 10.

Troll

Berserking

Activate to increase attack and casting speed for 10 seconds. Speed is raised by 10% at full health, increasing as health is lost to a maximum bonus of 30%. 3 minute cooldown.
Costs 10 Energy, 5 Rage, or 7% of base mana.

Regeneration

Increase health regeneration bonus by 10%. Also allows 10% of normal health regen during combat.

Beast Slaying

5% damage bonus when fighting against Beasts.

Throwing Weapon Specialization

Increases chance to critically hit with Throwing Weapon by 1% as of Patch 2.3 (was increase Throwing Weapon skill by 5).

Bow Specialization

Increase Bow critical strike chance by 1%.

Undead

Will of the Forsaken

Activate to become immune to fear, sleep, and charm effects. Lasts 5 seconds. 2 minute cooldown.

Cannibalize

When activated, regenerates 7% of total health every 2 seconds for 10 seconds. Only works on Humanoid or Undead corpses within 5 yards. Any movement, action, or damage taken while Cannibalizing will cancel the effect.

Underwater Breathing

Underwater breath increased by 300%.

Shadow Resistance

Increase Shadow Resistance by 10.

Blood elf

Mana Tap

Activate to reduce target’s mana by (50 + Level) and charge you with arcane energy for 10 min. This effect stacks up to 3 times. 30 yd range – Instant – 30 sec cooldown.

Arcane Torrent

Activate to silence all enemies within 8 yards for 2 seconds. In addition, you gain 10 energy or (5 + Level) mana for each charge of Mana Tap currently affecting you. 2 min. cooldown.

Arcane Affinity

10 point skill bonus to Enchanting (note, this also raises the cap by 10 at each level of enchanting).

Magic Resistance

Increase all Resistances by 5.

PVE TBC Resto Shaman Healing Guide (Short)

Welcome to our PVE Resto Shaman Healing guide for WoW TBC. This guide will show you what you need to know to play a Resto Shaman in dungeons and raids. This guide covers everything from talents to consumables!

Talents

This first build is designed for progressing new content. It provides higher survivability and threat reduction to keep you alive longer.

TBC Resto Shaman Build (Progression)

This alternative build is mostly intended for farming dungeons and such. While keeping the main healing talents we also dip into the Enhancement tree. This tree allows us to increase our groups DPS with totems and add a bit of extra mobility.

TBC Resto Build (Farming)

Gear

Gems

Gems can change based on your build, equipment and caps. You may need to adjust your gems to account for your gear.

Enchants

You may need to adjust your enchants to your gear. 

If you pick up enchanting you can benefit from Enchant Ring – Healing Power on both rings.

Consumables

Below is a list of consumables which help in any raid.

Professions

  • Leatherworking – This is a great choice for Resto Shamans. Allows you to craft useful gear all the way through! You also benefit from Leg enchants. You can also increase your raid utility by crafting Drums of Battle and Drums of Restoration.
  • Alchemy – This profession stands out because of Redeemer’s Alchemist Stone and the ability to craft consumables and transmutes.
  • Enchanting – Enchanting both of your rings will give you a boost plus you can save money enchanting your own gear.
  • Tailoring – A good option for players just starting out, the Whitemend and Primal Mooncloth sets are useful until you start getting T5 gear.
  • Jewelcrafting – Great gold making choice and you can make your own gems early on.

Stat Priority

  1. Healing Power
  2. Spell Haste
  3. MP/5
  4. Intellect 
  5. Spell Crit

Rotation

Water Shield should be on you constantly.

You can cast Earth Shield on the tanks and also casters to help with spell pushback.

Chain Heal will be your main raid healing ability. Rank 4 is also good to use because it costs 19% less mana but only heals for 10% less.

Healing Wave is your main healing ability for single targets. When things get dicey you can combine it with Nature’s Swiftness to get an instant heal off and save a life. A lower rank of Healing Wave can be used for efficiency also. Rank 1 can be used to stack Ancestral Healing and Healing Way on the tank.

Which Totems you use will be largely based on your group composition. Don’t forget that some of your totems are i